Content review for this game:
Pertaining to the ESRB rating.
|
Content sum up: Although there is an option to turn off the blood, gore and harsh language (sh*t and the f-word), they are still enabled in a handful of the pre-recorded cutscenes, the filters don't remove the static blood on floors and walls or the many bloodied bodies, and all gore is still present in the grotesque, bloody "Intestinal Fortitude" chapter; it's filled with intensely violent gameplay and disturbing enemies verging on horrific; there are some impacting scenes involving human torture; and there's still plenty of language left intact--like the last, even with the gore and (upped) language filter, this still isn't appropriate for younger teens. So, I recommend this game for ages 17+. |
Blood and gore: The blood effects spurt in a thick, jelly-like consistency and in heavy amounts when you or an enemy is shot. Blood does linger, splatters onto walls, floors and the screen (when you or an enemy is shot close-up); gathers in puddles; and there is static blood splattered on walls and floors throughout. Bodies do linger, and you see many heavily bloodied, dismembered and overall disfigured human (some Locust) bodies throughout. There is gibbing, meaning when you shoot enemies with the shotgun, revolver, sniper rifle, turret or throw a frag grenade, enemy bodies will explode into large, bloody chunks (heads will split in half--squishing sounds on impact included--and explode in detail when shot by a sniper rifle, as the enemy stand frozen in their last living position; heavy amounts of blood gushing from their necks), with the remaining dismembered limbs, torsos and body parts lingering in detail.
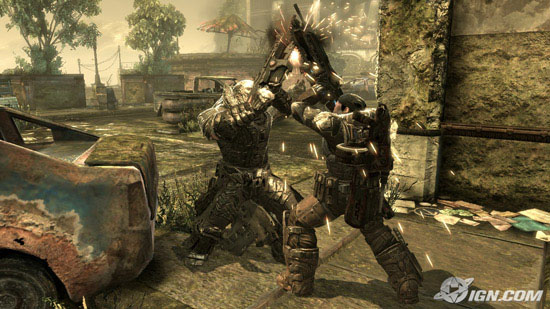
Additionally, a main weapon has a chainsaw attached to the end, and if used, it will sever the enemy diagonally--if you attack from behind, you'll shove it in their lower back and then sever up to their skulls--through their torsos (showing entrails, flesh and bone), as heavy amounts of blood spurt out and splatter onto the screen--their dismembered bodies (which you can then kick around, as blood smears about) linger, grotesque details of their innards visible. When they're down but not dead, you can finish them by stomping on their head--resulting in a crushed, bloody mess; grab them off the floor and use them as a "meat-shield," as they then absorb the enemy bullets with bloody results--you'll snap their necks when finished; or take the Torque bow, wrap the string around their neck, and then kick to decapitate them.
However, all can be disabled by going into "Options," "Game Settings," and then turning "Gore" from "on" to "off". The blood will then be substituted for sparks, and gibbing--along with the bloody sounds--will be completely disabled in all offline and online modes, but only for gameplay and in-game cutscenes. Pre-existing blood on floors and walls, the many bloodied bodies and the bloody sounds in the in-game cutscenes will stay. Lastly, even with the "Gore" filter enabled, all blood and gore is still present during the entire chapter dubbed, "Intestinal Fortitude" (which is detailed in "Specific scenes" below); and all blood/gore remains in pre-recorded scenes that handle the more epic-scaled, non-gameplay sequences--but these scenes can be counted on one hand, are brief and contain very little gratuitous effects.
Specific scenes of blood & gore:
- The opening scene shows sweeping views of what appears to be a volcanic Imulsion-filled battlefield with distant and undetailed shots of dead, bloodied bodies strewn about. It then shows a few quick, chaotic shots of human soldiers fighting in a battlefield with some blood splatter coming from their bodies.
- An optional War Journal titled, "Ambulance Driver's Log" talks of patients who have been coughing up "blood & reddish-brown mucus" from their mouths.
- In an early gameplay sequence, you briefly see a fellow human soldier's head blow off with a squish, as blood spurts heavily from what remains of his neck.
- After dispatching of a giant Brumak with a mounted turret, you see close-up shots of the last few rounds penetrating its eyes, causing heavy amounts of blood to continually spurt from its eye sockets and face, as you then run it over.
- When all seems lost for you and your team--during an overwhelming Locust ambush--a backup team member, Cole, breaks through a barricaded door. He proceeds to rush the Locust in front of him, with his chainsaw to its middle, flips it over his head, moves to the next, tags it with a grenade and finally shoots the last Locust point blank in the head, causing the head to explode in bloody chunks with a squish, as blood spurts heavily from its neck. The scene closes with a shot of the tagged Locust struggling to get the grenade off its back, which soon detonates, resulting in the Locust's body exploding into detailed, bloody chunks.
- You find out that the Locust have begun to take human prisoners and transport them in torture ships with horrific conditions. As you search the many rows of tiny and inhumane cells (with only enough room for prisoners to stand in) you discover an occupied cell containing a main character, who also happens to be one of your team members. He walks out slowly, dazed and shirtless, as you view deep and bloodied lacerations all over his torso. It then cuts to his back, showing most of his flesh ripped away in strips, with even deeper wounds than in the front, and chain loops imbedded in his back. Marcus (the main playable character), thinking the character--though not sound of body--is sound of mind, tosses him a shotgun and tells him to come along. However, you see he's in obvious pain, as he slowly presses the shotgun up to his chin with a whimper. Marcus sees this and runs to stop it, but ends up being too late, as the tortured, broken man pulls the trigger, with you briefly seeing light bloody chunks fly from his face before it quickly cuts away. It closes with a view of his bloodied lower body (no other detail is visible; his severed head and neck isn't shown).
- A chapter called, "Intestinal Fortitude" is devoted entirely to you and your team navigating through the body of a mammoth (devouring whole cities mammoth) Rift Worm, and after being swallowed whole by said creature, your objective is to destroy it from the inside and get out. You start in its mouth, laced with its live, pulsing and writhing flesh, and ruined buildings' debris, as you walk through steaming pools of gooey, green saliva, and dodge under its giant teeth while they open and close--thick threads of its saliva stretching between them.
- After getting past its mouth and arriving closer to its digestive juices, you see one of your lesser team members lying on his back as he's attacked by the Nemacyte, the Rift Worm's protective antibody-like guards; large, insect-like creatures that eject from inside its body and skitter on the surface. They continue to tear away at him, as his blood splatters heavily from his body, until you force them off with gunfire. However, it's too late, mostly due to the fact that he is submerged in the Rift Worm's digestive acid, which resulted in eating away the majority of his torso; you see him lying with his rib cage and innards exposed, drenched in green acid, as he writhes around weakly until death.
- As you continue to navigate through the Rift Worm's innards, you shoot through several "doors" made of round, intestinal walls, which then slowly relax and open from the middle, as gobs of thick, sticky saliva break apart and create openings--and you'll also saw open a few walls made up entirely of membranes of flesh, with its blood splattering and spurting heavily from the severed areas.
- After you find the wall to the Rift Worm's heart chamber, you use your chainsaw to cut through it. It then switches to a cutscene, which shows as Marcus cuts and squeezes through several feet of gooey, raw, red walls of flesh, repeatedly ripping his chainsaw into the next area, as the flesh spurts heavy blood and sickeningly tears, separates and springs apart, until he's completely through.
- While you make your way to the Rift Worm's heart chamber, you hear its ever-loudening heartbeat as you get closer. When you reach it, you find a pulsing heart about the size of a small house, with two giant arteries on either side. You then proceed to cut through both with your chainsaw--in gameplay--resulting in sickening squishing and crushing sounds, as you hear the heart start to weaken in its beats and see the last connecting bit of the arteries rip apart slowly under their own weight, with gallons of its blood pouring from all the severed ends, staining your body all the way up to your neck in bright red blood--you then continue this process several more times (since the Rift Worm has several hearts). When you reach the final heart, you proceed to cut open its arteries, causing the Rift Worm's heart chamber to start to rapidly fill with blood, which begins to drown you. You then wade to an outer wall and begin to cut through.
- After destroying the Rift Worm's final heart, it cuts to an exterior shot of the Rift Worm reacting to its inner damage by rearing up and howling in pain while it coughs up heavy amounts of blood, and then dramatically flops to the ground dead. It switches to a shot of the side of its body, as you see two chainsaws pop out from the inside, cutting in a circular pattern, as its flesh shreds, and heavy amounts of blood fly. The Rift Worm's skin is soon punctured open in a large, rounded flap, as a huge waterfall of blood pours out with you and your team. You continue to view as gallons of blood and giant chunks of flesh pour out of the hole, while you see a few close-up shots of your team totally soaked and dripping with its thick, congealed blood, as they then start to cough it up.
- An optional War Journal titled, "Prisoner's Journal: John Harper" has the soldier describing the conditions in the Locust prison; "The Locust are taking prisoners, putting them in weird coffins. I'm coughing brown chunks from my lungs and it's making me puke"--he goes on to describe how he's "sitting" in his "own puke."
- As Marcus and Dom search through the huge clusters of pod cells in the Locust prison camp for Dom's wife, Maria, you finally come upon the cell marked with her identity. After you break the cell open, you see a completely intact Maria slowly stumble out and into Dom's arms, without a word. It then shows him kneeling with her in his arms, as color fades from the screen, and he snaps out of it to find her a mindless, unresponsive, emaciated shell of a human, with gaunt, lifeless eyes rolled up into her head, ashen skin stretched over her bone protruded face, toothpick limbs, a head of thin, wispy hair, and bloodless gashes imprinted in her forehead. He repeatedly screams and mourns in pain while cradling her back and forth; seeing she is beyond repair, he puts his forehead against her's and says his good-byes, as it then cuts away--you hear the shot.
- An optional War Journal has one of your main team members, Baird, describing a necklace he found during his exploration of the Locust underground, and says that the necklace is, "made from human fingers" and continues with, "This thing is so completely beyond nasty, I don't even want to look at it any longer."
- After defeating a Reaver boss, you see the final bullets from your turret shred away at its head, mouth and body with bloody results as its tentacles break off, and it explodes into many large, bloody pieces, while it falls from the sky.
- In a later sequence, you again see an ally's head blow off with bloody results.
- Nearer the end, You see a couple of dead, Imulsion-infected Locust lying on the floor without heads or limbs, and torn open, with yellow Imulsion leaking out.
- You walk through a narrow hallway with cells on either side, where the Locust keep their Bloodmounts, which they mount and ride like two-legged horses. In the middle of this aisle are a few slanted tables that have rotted, shredded, skinned and dismembered human corpses chained to them--they're used for the Bloodmounts' food. The corpses are ripped open enough to reveal the muscular and skeletal system, as well as their entrails and brains--as you traverse this area, you see more, many with the lower bodies lying separately on the floor.
- After piloting a hulking Brumak (a giant, two-legged Locust with a missile launcher strapped to its back), you park the Brumak in a wading pool of pure Imulsion, dismount and enter your evac helicopter. The Brumak soon starts to mutate from the Imulsion and grow at a rapid rate, as it sprouts large, slimy tentacles from its body, which in turn develop fanged mouths of their own. It continues to grow as its flesh twists in a grotesque manner, and for its final transmutation, it opens its mouth and regurgitates a second head, which then opens its new mouth, revealing rows of giant, fanged and saliva laced teeth.
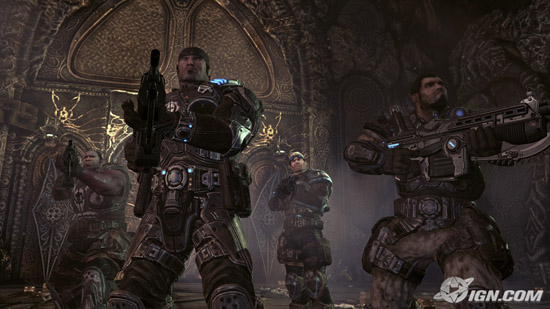
Intense violence: Six months after defeating the Locust General Raam and placing then detonating a Lightmass bomb at the Locusts' tunnels' heart, Marcus and his team succeeded in wiping out many of the Locust and completely destroying the legion known as Kryll; but they find that not only did the bomb release a gaseous and toxic form of liquid Imulsion into the atmosphere--causing what they call "Rustlung" in the remaining human forces--but much of the Locust Horde has survived, including their ever-elusive Locust Queen. The human COG (Coalition of Organized Governments) forces have begun to slowly discover this, as two of their more secure cities have been abruptly sunk by unknown Locust attacks, and you soon find out the remaining human stronghold, Jacinto, is being targeted for the same. Marcus and his team must deal with even greater resistance, as Dom searches for his captive wife, Maria, and Marcus uncovers dark secrets of his father's past, all the while they (once again) advance into Locust territory and try to foil the enemy's plan for Jacinto...
After you're introduced to a new COG recruit, there's the choice to give him basic training or get straight into the action. And the base gameplay consists of navigating through the vast, ruined environments, as you combat hordes of Locust, by vaulting over, sprinting to and taking cover with objects (downed cement pillars, burned out cars, etc.), while using your varied arsenal to pop out from behind cover and shoot the enemy down. You'll hold the area against Locust waves as Jack (your cloaked, hovering robot) cuts open doors or gathers intel; flank, take out and then use enemy turrets to dispatch incoming enemy waves; kick open doors, press buttons and turn valves/pull levers to activate lifts, open gates and pop-up retractable cover; and use your chainsaw to clear barricades. You'll also navigate a Rift Worm's insides while trying to sever its arteries with your chainsaw; drive a Centaur tank as you shoot down enemies and jump gaps; fight bosses like the aquatic Leviathan or Skorge, the Locust Queen's chainsaw staffed lackey; and pilot a Reaver in an on-rail sequence while shooting at and dodging Skorge's giant Reaver's jaws and missiles.
Your enemy consist of the Locusts--which closely resemble Orcs from the Lord of the Rings--their many types: Drones, Theron guards (smarter, faster versions of the Drones, often equipped with the deadly Torque bow), Kantus (tall, monk-like Locust that primarily use their powers to remotely revive downed Locust), Boomers (and their sub types; Grinders, Maulers and Flame--huge, slow and lumbering Locust equipped with Boomshot grenade launchers, Mulcher gattling guns, Boomshields and Scorcher Flamethrowers respectively), and Sires (mysterious, reject experiment; these Locust, human "hybrids" only appear once). And their more mindless lackeys; Tickers (quick, crawling trip mines), Wretches (small ape-like, hunch-backed Locust), Bloodmounts (large, two-legged creatures with Beast Rider Locust mounted to pilot them) Seeders (giant, ant-like creatures that shoot out Nemacyst; gooey, organic projectiles that explode on impact), Reavers (flying squid-like creatures the Locust ride) Corpsers (giant, multi-legged, insect-like Locust), and Brumaks (two-legged, three-story Locust with missile launchers strapped to their backs).
You'll be combating these varied enemies with the Lancer assault rifle (a chainsaw equipped at the end), Snub pistol, Longshot sniper rifle, Gnasher shotgun, Mulcher (a portable turret), Scorcher flamethrower, Mortar (launches missiles that fall from the sky), Hammer of Dawn (a satellite-guided laser; only used twice), Boomshot grenade launcher, Boltak revolver, Hammerburst assault rifle (an accurate, one-shot, long-range rifle), Gorgon Burst pistol (shoots multiple, short bursts) Torque Bow (shoots exploding arrow-like bolts), the Boomshield (used for portable cover), and grenades; Frag, Smoke (stuns enemies/clouds vision) and Ink (ejects choking gas).
The combat system is relatively strategic, but in turn, utterly chaotic and very violent, and consists of you using your varied arsenal to tear through the hundreds of enemy Locusts; Troika turrets, the Mulcher and Mortar to literally blow them to pieces; your chainsaw to sever them in half; grenades, the Boomshot, nearby explosive objects and flamethrower equipped enemies' punctured tanks to take out close-by Locusts (causing their bodies--parts--dust and debris to fly); the flamethrower to burn them alive (with their partially disintegrated corpses smoldering, as the remaining, glowing embers float in the air after the fact); the Torque Bow to impale them with large, arrow-like bolts, which then explode on impact; Ink grenades to choke them in thick, green clouds of gas; the Hammer of Dawn to incinerate enemies with a laser pillar from the sky; the butt of your weapons and the Boomshield to attack--or hit and pin grenades to--them in close quarters; and you can use the down but not dead Locust enemies as "meat shields" to absorb incoming enemy bullets--you'll snap their necks when you're done--or simply hit them while their down to finish them off.
When shot, enemy Locust will grunt in deep, grizzled tones, gurgle and then fly back and fall in contorted positions, either dying immediately or crawling around on their knees awaiting revival from their allies, only to be shortly stomped to death by you; but as they are hideous, mindless monsters, it isn't too impacting--there's not much sympathy to be had. Coupled with their monstrosity; overwhelming odds (your three to four against their dozens upon dozens); environments' semi-destrucable nature (wood breaks away; glass shatters; bullets imbed, melt, and then smolder in floors and walls; concrete objects gradually crumble with heavy gunfire or explosions, as pieces fly off in chunk and linger, with their steel underwire exposed, etc.); and their equally destroyed facades (cities are overturned and ripped apart; dirt, debris and tons of rubble litter the areas, with later cities sunk into the earth--insurmountable, multi-level ruins; entire buildings falling into sinkholes, as their ashes and lit embers fill the air), it gives the overall combat a tense, gritty and hostile feel.
And although you and your team are muscular, gun-toting men with massive chips on your shoulders--making you feel more empowered than the average survival/horror "victim"--the Locust can definitely hold their own, and since the environments are usually wide open, and for the fact that enemies can burrow from underground, you're never sure where they'll come from next. You'll at first hear a low, distant rumbling, with the enemy abruptly piling out of their emergence holes, grunting threats and taunts in deep, gravelly voices, as they put heavy fire on your position, and then try to trap you from all sides. Enemies will frequently shoot from the deadly Troika turrets at the other end of the area, as waves of them take cover, close in and flank you; Scorcher equipped enemies will attack in cramped quarters and let their blazing flames loose (if you puncture the tanks on their backs, they will try to rush you in a kamikaze attempt); and later enemies will either snipe you, use the Torque bow to shoot you from afar or the deadly Mortar weapon to barrage you with multiple missiles from the sky (which almost always kill you in one hit).
Enemy encounters only get worse the further you get in, with the more powerful enemies being introduced, mixed with the lesser; Tickers quickly skitter from holes in groups as they hiss/click, stop at your feet and detonate; Wretches abruptly rush you in droves and tear away at you with their claws (often as you deal with other enemies from a distance; Wretches and Tickers flush you out); Boomers (Grinders, Maulers and Flame) are huge, (thankfully) lumbering Locust, who use the Boomshot, Mulcher, Scorcher and Boomshield--with maces--as they bellow, "Boom!" (etc.), taking many more shots to down than an average Drone; resilient Reavers land on their tentacle legs, shooting missiles point-blank while trying to impale you with said legs (even when dead, they'll explode, killing you if you're too close); Bloodmounts gallop on two hulking arms, vault over cover and then rush you with two razor-sharp clawed legs, while their rider shoots away; and Kantus, tall, tough Locust that revive downed enemies and attack with powerful burst pistols and choking Ink grenades.
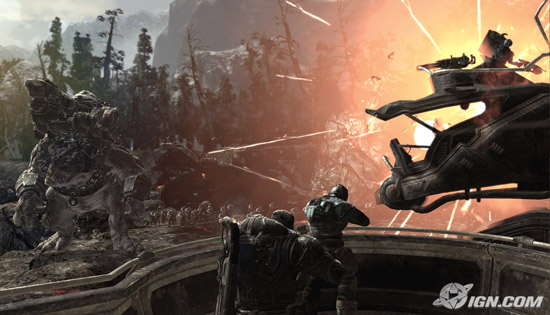
Because of the above enemies, the gameplay is an intensely suspenseful, non-stop, heart-pumping thrill-ride--often verging on horrific; you'll ride the giant, "Derrick" platformed carrier, as you gun down incoming Nemacyst projectiles and Behemoth Brumaks with a mounted turret, while dealing with Locust trying to grapple onto and hijack your vehicle; traverse through a mammoth Rift Worm's body as you dodge a regurgitated ball of rubble the size of a house, avoid deadly, shooting spouts of acid, navigate through its toxic, maze-like intestines before suffocation; and escape before you drown in a rising pool of its blood; you'll explore an abandoned secret facility while you dodge and disable it's security system, all the while dealing with hordes of incoming Wretches at the same time; and after inadvertently awaking the Sires from their sleep (grotesque, reject experiments with twisted flesh, and long, disconnected tubes sticking from their humped backs), they'll eerily pound at and quickly break from their vats, as they then rush you with their huge claws by the dozens--only stopping when the vast amounts of vats have been completely emptied.
And since you can't take more than a few hits from most enemies, if you don't take adequate cover from their fire in time, a small, red skull emblem will begin to gradually solidify in the middle of the screen, getting clearer the closer you get to death, as the screen fades and sound muffles all around--you'll then either crawl, and bleed out as you wait for an ally to revive you, or die. Your team is vulnerable to the same enemy fire, and when downed, they will fall and hunch helplessly to the floor as they bleed out, calling to be revived, forcing you to make it through enemy fire, or else lose their support. And as some of your cover is destructible, you're not always safe (or really ever for that matter); it's you and your three teammates against (dauntingly) the entire Locust horde--you're always on the offense.
The cutscenes contain fiery explosions and chaotic battles--with some allied vehicles crashing into flame; you see a few allied soldiers shot down by the enemy; there are frequently intense, often horrific situations involving the main characters; Locust end up taking human prisoners and torturing them, with you witnessing two of the brutal outcomes; and there are a couple of tragic main character deaths. When it comes to age, although there is an option to turn off the blood, gore and harsh language (sh*t and the f-word), these elements are still enabled in a handful of the pre-recorded cutscenes, the filters do not remove the static blood on floors and walls or the many bloodied bodies, and all gore is still present in the very grotesque, bloody "Intestinal Fortitude" chapter; it's filled with intensely violent gameplay and disturbing enemies verging on horrific; there are a couple of impacting scenes involving human torture; and there's still a considerable amount of language left intact--like the last, even with the gore and (now upped) language filter enabled, this still isn't really appropriate for younger teens; it's just more suited to older teens and adults.
Strong language: There are over five dozen uses of sh*t, over three dozen uses of hell, over two dozen uses of a**, over a dozen uses of d*mn and b*tch, under a dozen uses of God d*mn, the f-word and bastard, three or under uses of God, p*ss and SoB, and one use of "t*tties" (a main character refers to his vehicle's headlights as this). However--other than a few of the pre-recorded cutscenes, which still contain a couple uncensored uses of sh*t--if you enable the "Strong Language" filter, all uses of sh*t and the f-word will be censored in gameplay and in-game cutscenes.
Additionally, a few of the collectable--and optional--War Journals have nine uses of hell, two uses of d*mn, and one use of a**, bastard and God in their text. Other than the main script, allies will very rarely--I caught it once--call your character a "P*ssy" when reviving you; when being revived, your character will (I again, only caught this once) rarely say, "Now I'm p*ssed!"; your character will infrequently say, "D*mn it!," "Ah, sh*t!," and very rarely (I only caught this once too) "God d*mn son of a b*tch!" when his weapon jams; and your team will frequently use hell, sh*t and phrases like, "Back in your hole b*tch!" and, "Eat sh*t and die!" while fighting the Locust.
Content review posted: 04/30/09
![]()
|
|
- Available on: Xbox 360
- More information: Wikipedia
- Cover scans: MobyGames - CoverGalaxy
- GameFAQs.com: Xbox 360
- Press: IGN: 9.5 - GameSpot: 9.0 - Metacritic (average): 93